Third-party Tools
The Foundation Project creates a simple layer to manager many components, under the hood we have the thirty-part tools. They are used to manager services, containers, load balancing, reverse proxy and other stuff. The Foundation user can create they own modules and can connect other applications to increase the platform functionality.
Docker Swarm
Docker is a tool designed to make it easier to create, deploy, and run applications by using containers. Containers allow a developer to package up an application with all of the parts it needs, such as libraries and other dependencies, and ship it all out as one package. Docker is the most popular open source container manager solution, and docker swarm is a clustering and scheduling tool for Docker containers. With Swarm, IT administrators and developers can establish and manage a cluster of Docker nodes as a single virtual system.
For more information: https://docker.com
What about the logs ?
As said, we use docker swarm as clustering solution. So you can access all your logs using docker service logs command feature.
Docker allow us to create logs monitoring solutions as logging drivers, described at: https://docs.docker.com/config/containers/logging/configure/
Foundation has a optional log viewer.
Zabbix
Zabbix is the most popular open source monitor application. It is maintained by the zabbix community and is used by several of the largest IT companies. More details about zabbix platform: http://www.zabbix.com
The Zabbix Operation Modes
The zabbix monitor supports two distinct operating modes, which are Proxy Mode and Server Mode.
To start zabbix on server mode, we might execute the following command line on terminal:
$ sudo foundation monitor zabbix server
Otherwise, you can run zabbix based on proxy mode. In this case, you should have the premise that there is already a zabbix server platform running on another host. Therefore, we can execute the following command:
$ sudo foundation monitor zabbix proxy ${SERVER_IP} ${PORT}
Configuring Zabbix Web to Monitor Docker Containers
After command line execution, we can access zabbix web interface using URL http://
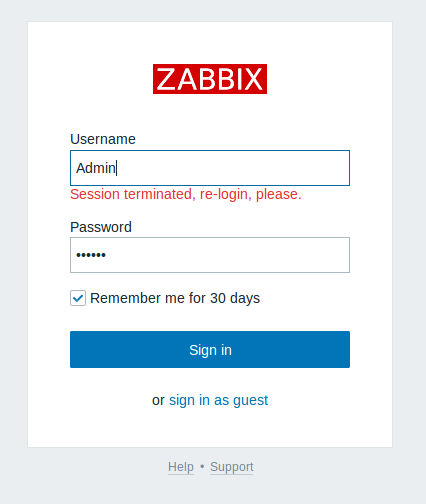
Figure 1.1 - Zabbix Login Screen.
With the user logged in, we can view the zabbix dashboard. On screen, we can make settings to obtain the best visualization of the monitored hosts. The Figure 1.2 shows the zabbix dashboard.
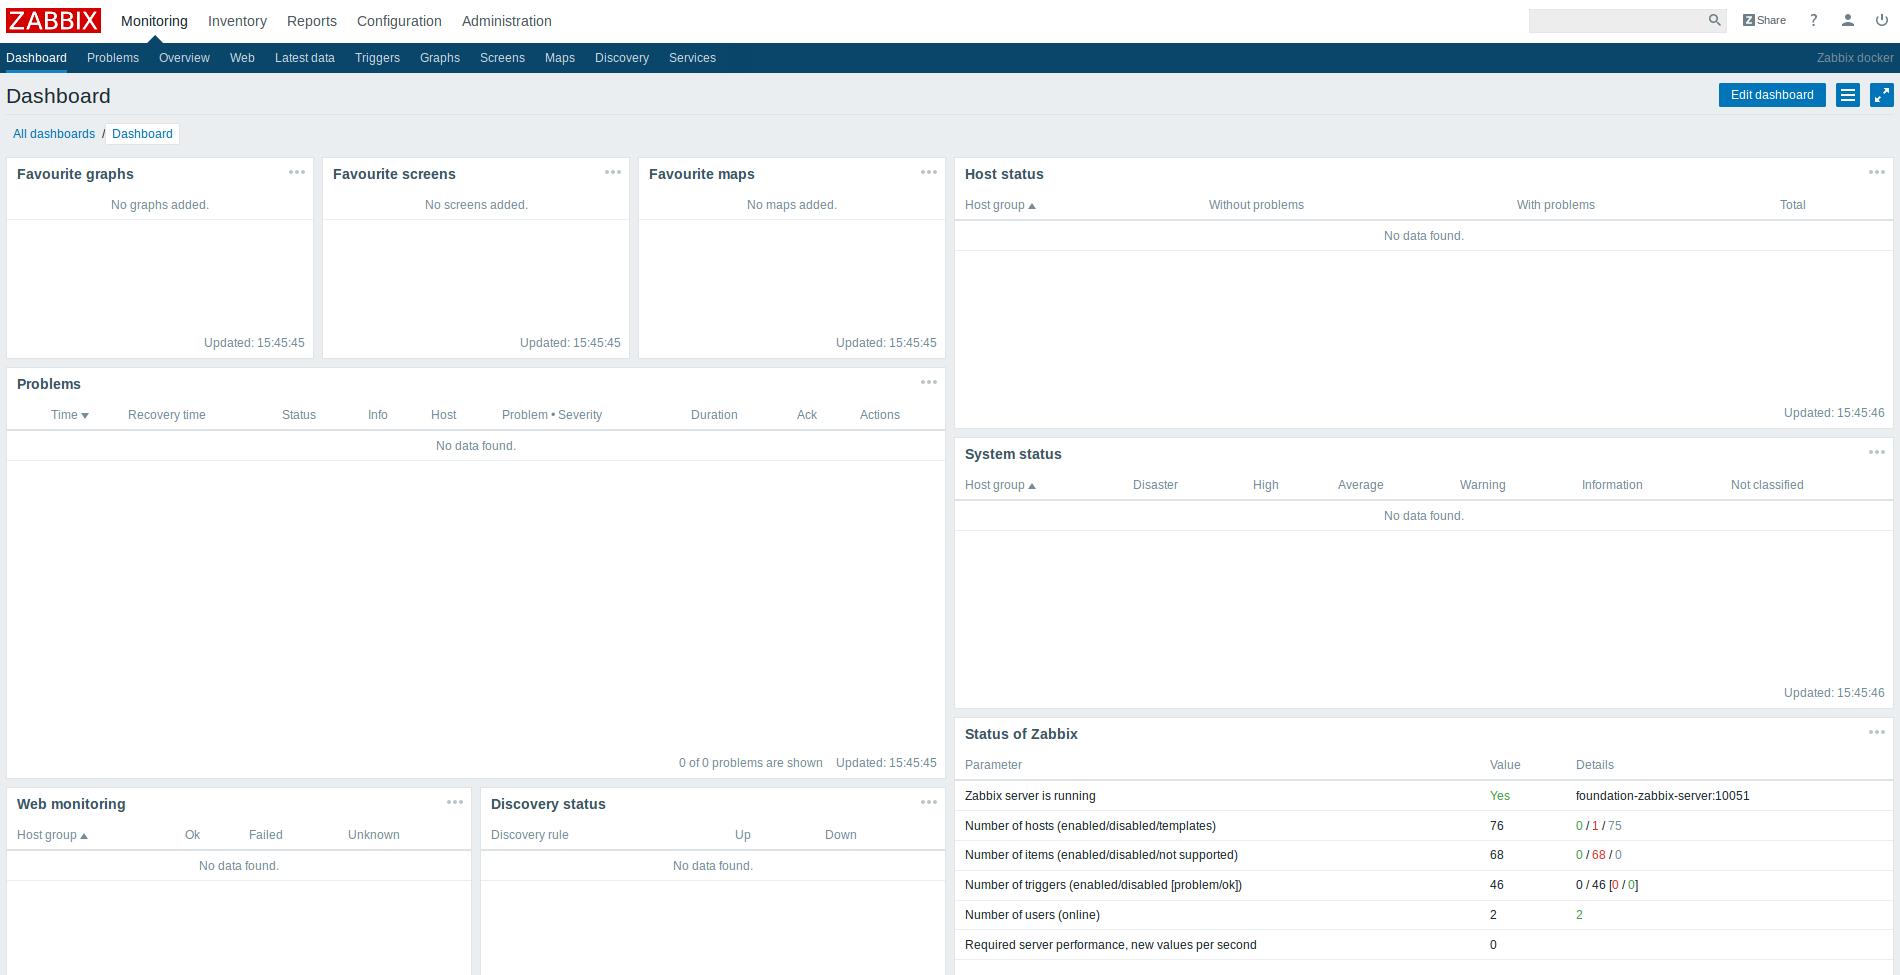
Figure 1.2 - Zabbix Dashboard Screen.
In this first step, we should define the template that will configure which metrics will be selected and obtained from Docker containers. The Foundation Team provides some default templates, but we don't are responsible for supporting them. The links below make available the XML files of the templates used by us:
1st Step - Importing zabbix template file.
1. Go to Template tab presents in Configuration section.
2. Click on "Import" button. Consequently, we will redirected to import screen (Figure 1.3).
3. Click on "Browse..." button and select the template file.
4. Select the template.xml file and after click on "Import" button.
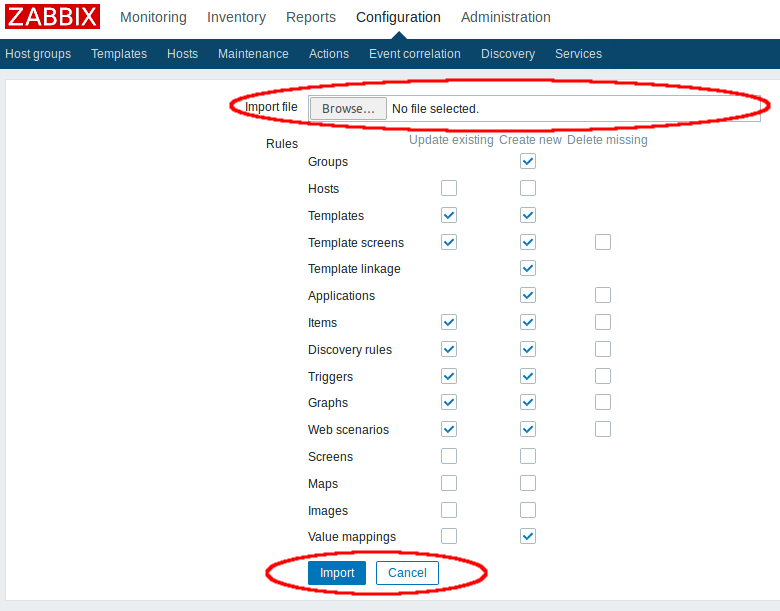
Figure 1.3 - Zabbix Template Import Screen.
2nd Step - Configuring host and zabbix agent.
1. In Configuration Section, go to "Host" tab.
2. Here, we will create a new Host. Click on "Create Host" button. Automatically, we will be redirected to "Host" screen (Figure 1.4).
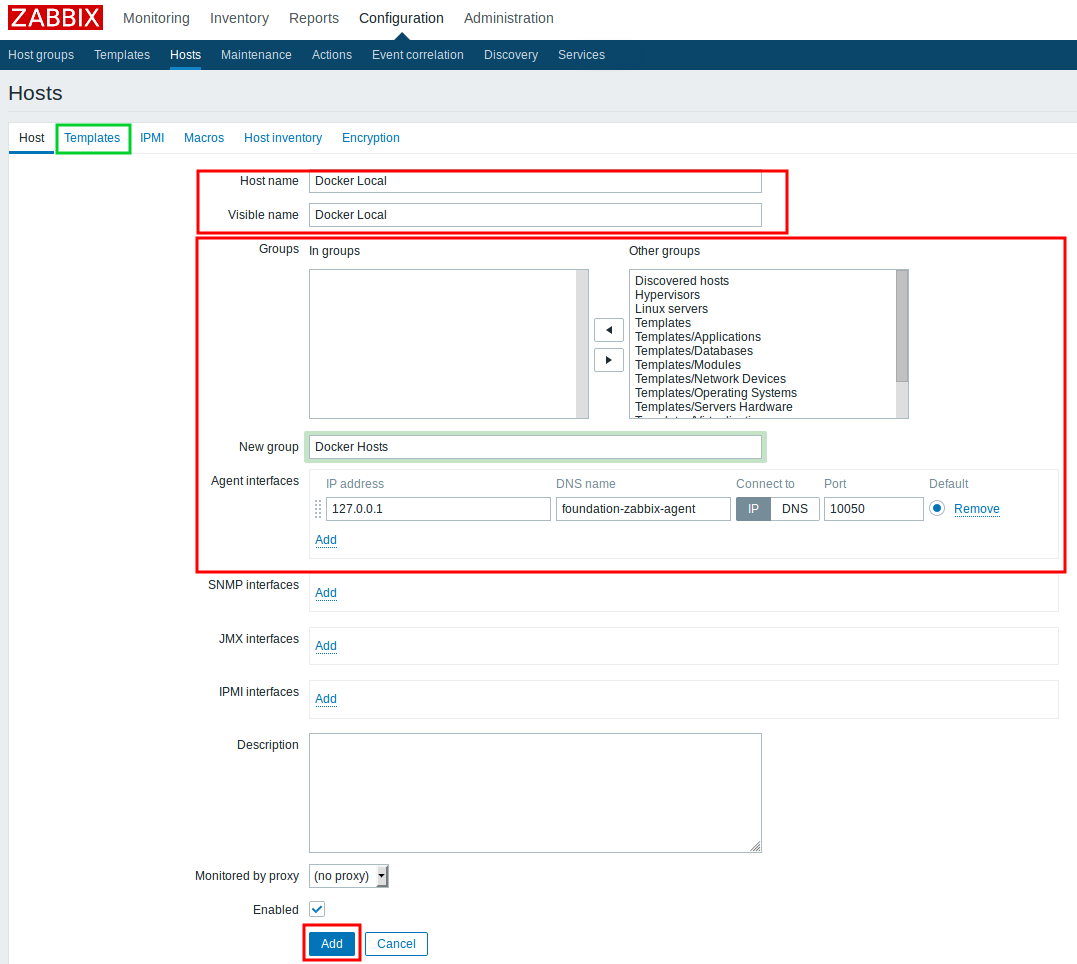
Figure 1.4 - Zabbix Create Host Screen.
3. On the screen, it is necessary to fill the fields "Host Name", "Visible Name".
4. We should also assign a host group to the new host, in "Groups" or define new group on "New Group" field.
5. ** IMPORTANT ** -> We must configure the "Agent Interfaces" field, because this field is responsible for defining the zabbix agent communication. We have two options, use "IP Address" or "DNS Name". To select which option to use we can check the "Connect To" field. It's recommended uses the "DNS Name" and set it with value "foundation-zabbix-agent" on port "10050". One way to check if everything is working, we should only see if the "ZBX" flag is colored green (see Figure 1.5).
6. Now, we should assign the imported template to the new Host (in this case will associates it to "Docker Local"). To do this, we should access the "Template" tab (next to "Host" tab - Figure 1.4) and find it clicking on "Select" button.
7. After template is selected, we should only click on "Add" link to associate the template to host. Next, click on "Update" button.
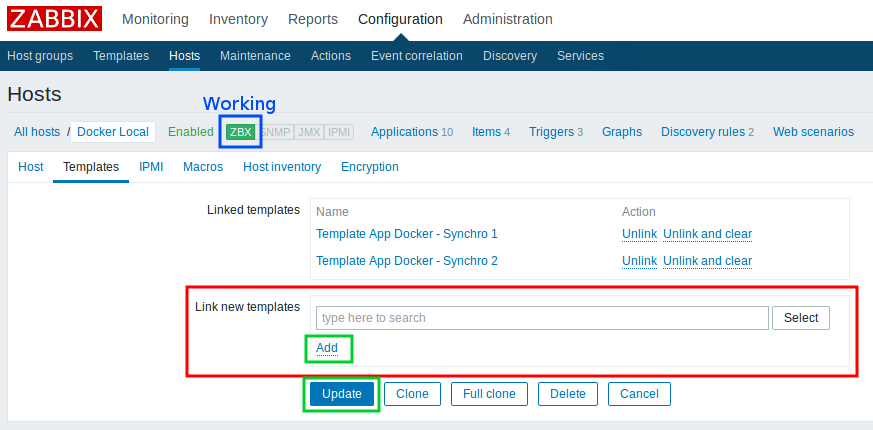
Figure 1.5 - Zabbix Template Screen.
3rd Step - Waiting for Results.
Now, we only have to wait for the results to be retrieved and view them in the "Graphs" tab in the "Monitoring" section (in Synchro Template 2 - the results are demonstrated in the "Latest Data" tab). Figure 1.6 shows the graphical results of the containers running on the docker host.
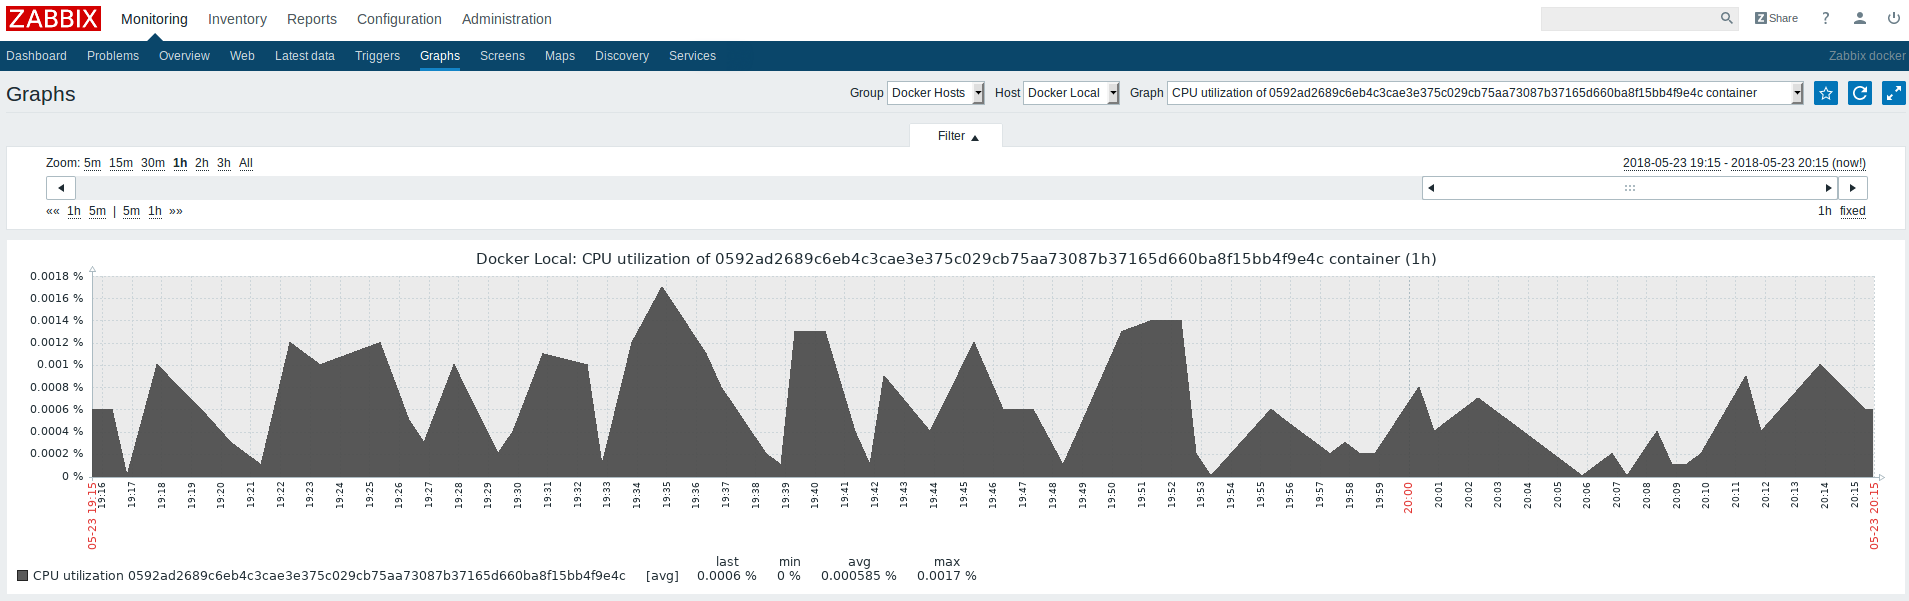
Figure 1.6 - Zabbix Graph Screen.