Foundation Keycloak Advanced
Setup
The steps below describe how to configure keycloak to foundation:
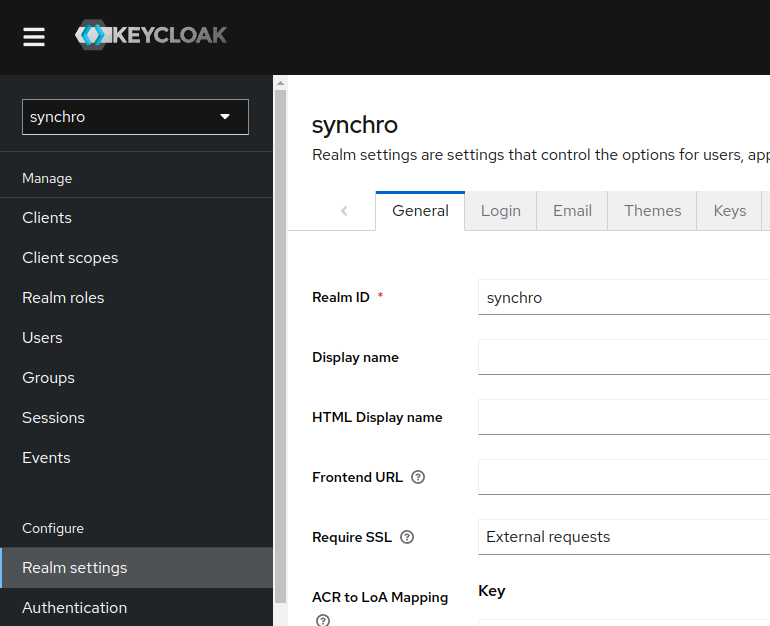
Realm
Once you have an administrative account for the Admin Console, you can configure realms. A realm is a space where you manage objects, including users, applications, roles, and groups. A user belongs to and logs into a realm. One Keycloak deployment can define, store, and manage as many realms as there is space for in the database.
About Login
Check Login information.
Important
It's strongly recommended that you do not use the master realm to manage the users and applications in your organization. Keep the master realm as a place for super admins to create and manage the realms in your system. This keeps things clean and organized.
Realm feature, see keycloak realm.
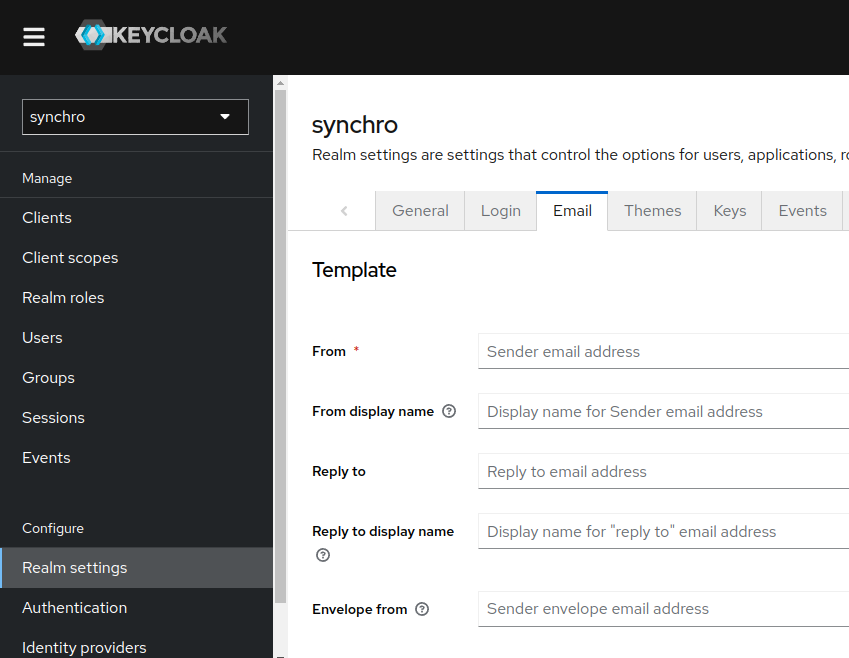
Email
Keycloak sends emails to users to verify their email addresses, when they forget their passwords, or when an administrator needs to receive notifications about a server event. To enable Keycloak to send emails, you provide Keycloak with your SMTP server settings.
For more information, see Keycloak Email.
Procedure
-
Click "Realm settings" in the menu.
-
Click the "Email" tab.
-
Fill in the fields and toggle the switches as needed.
Themes
Keycloak provides theme support for web pages and emails.
Procedure
Default theme
-
Select Realm.
-
Click "Realm Settings" in the menu.
-
Click the "Themes" tab.
-
Select
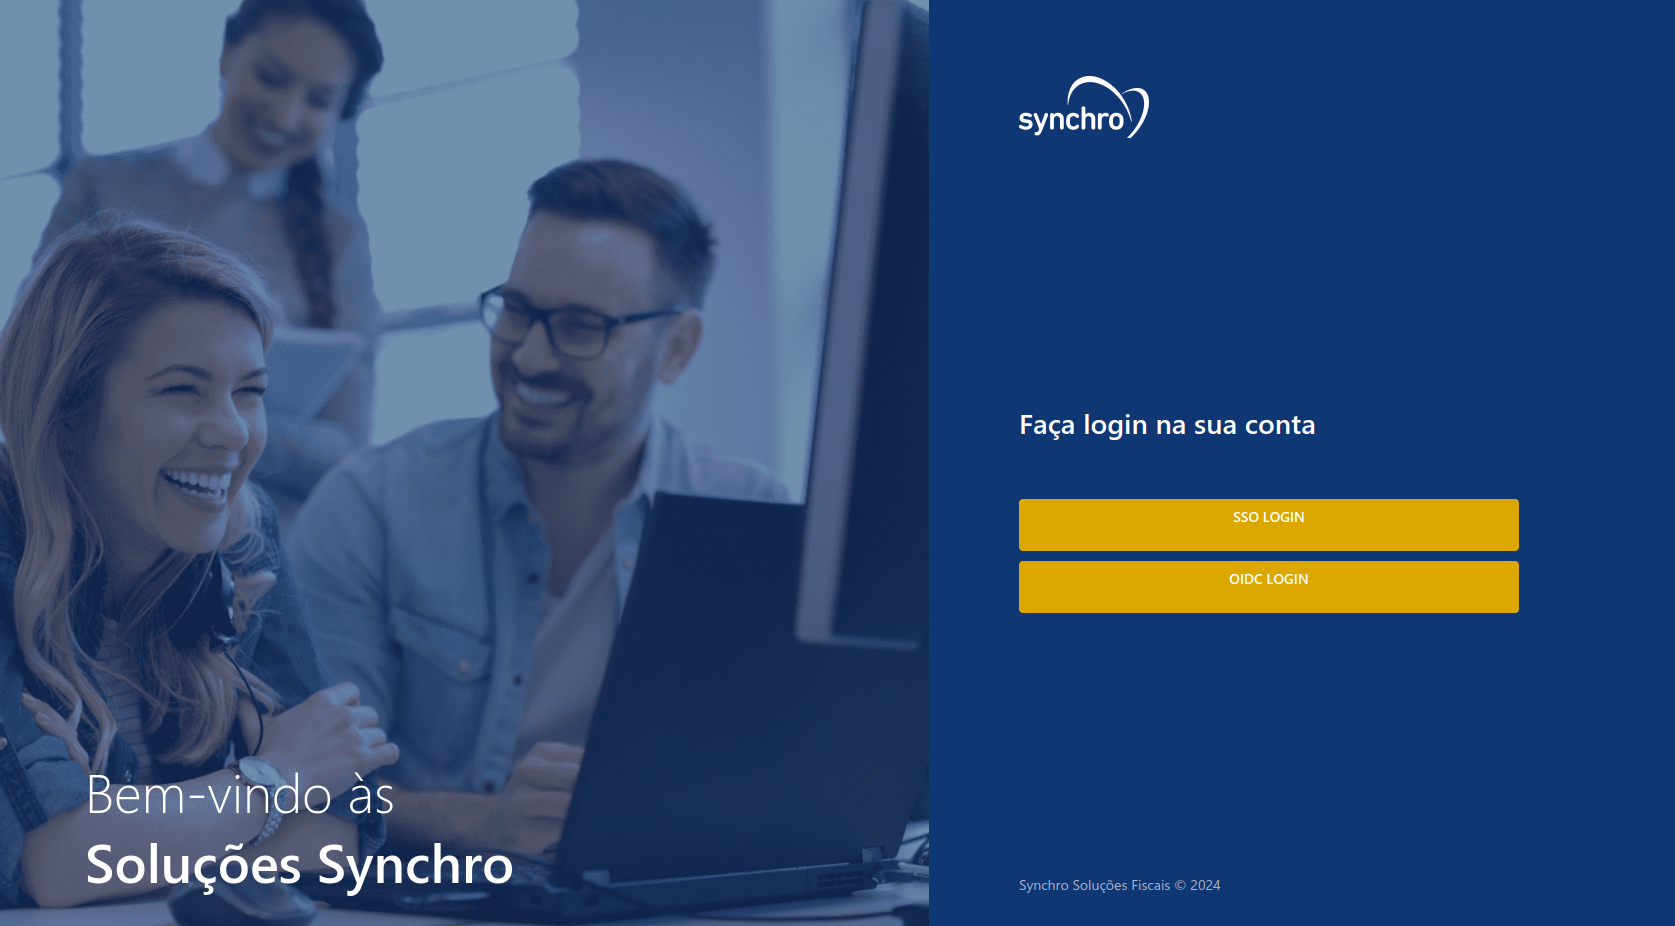
synchrotheme available themes box. login-page-sso-buttons-only.png
Login page with synchro theme
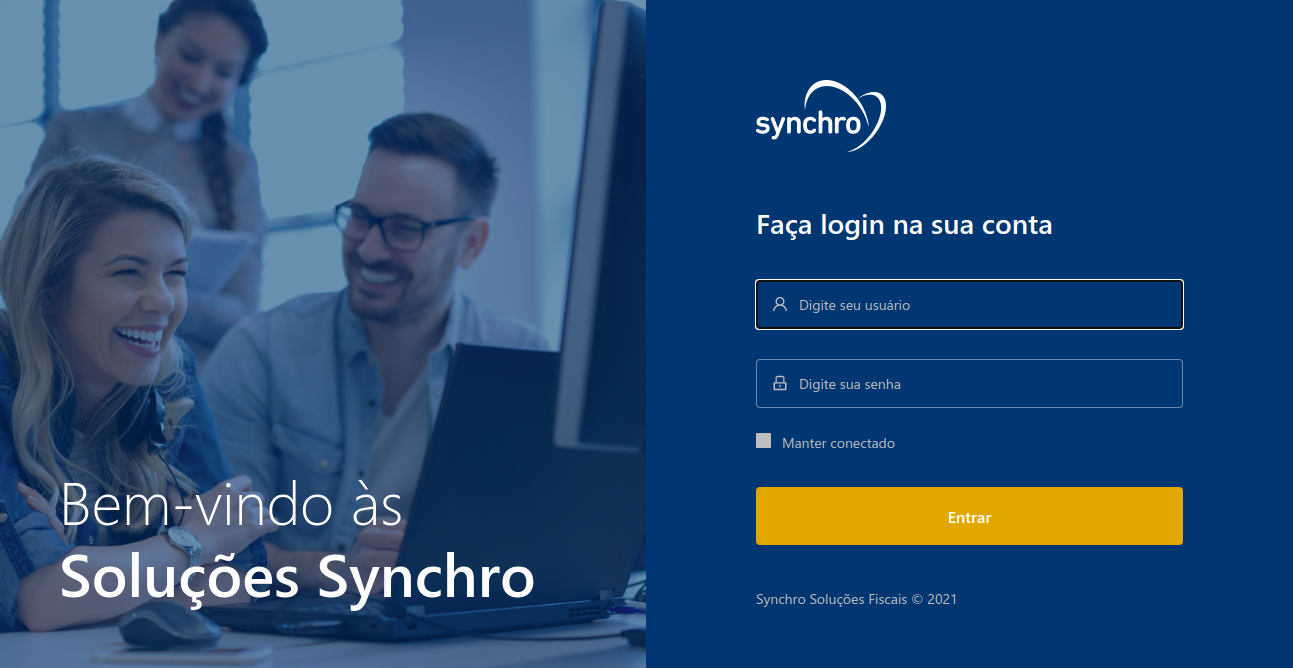
SSO/OIDC Buttons only at login page
-
Select Realm.
-
Click "Realm Settings" in the menu.
-
Click the "Themes" tab.
-
Select
synchro_sso_onlytheme available themes box.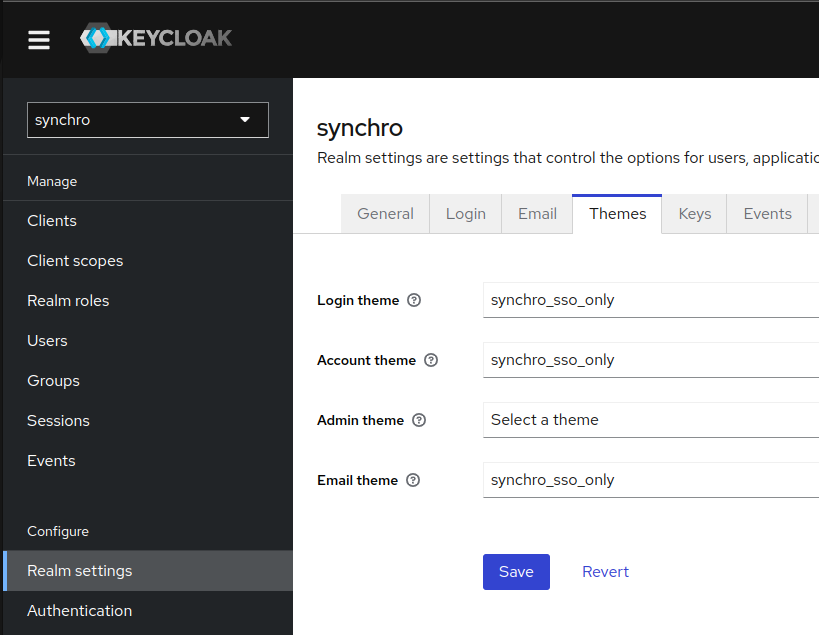
Login page with synchro sso/oidc buttons only theme
Clients
Clients are entities that can request Keycloak to authenticate a user or get roles information.
Procedure
-
Click "Clients" in the menu.
-
Click "Create".
-
Create a Client ID following the Pattern:
Example for Client ID:
Pattern:
<tenant>-<environment>TenantID:
SYNCHRODESENVOLVIMENTOEnvironment:
desenvolvimentoClient ID:
synchro-desenvolvimentoCheck available environment default list.
Client feature, see keycloak client.
-
Save.
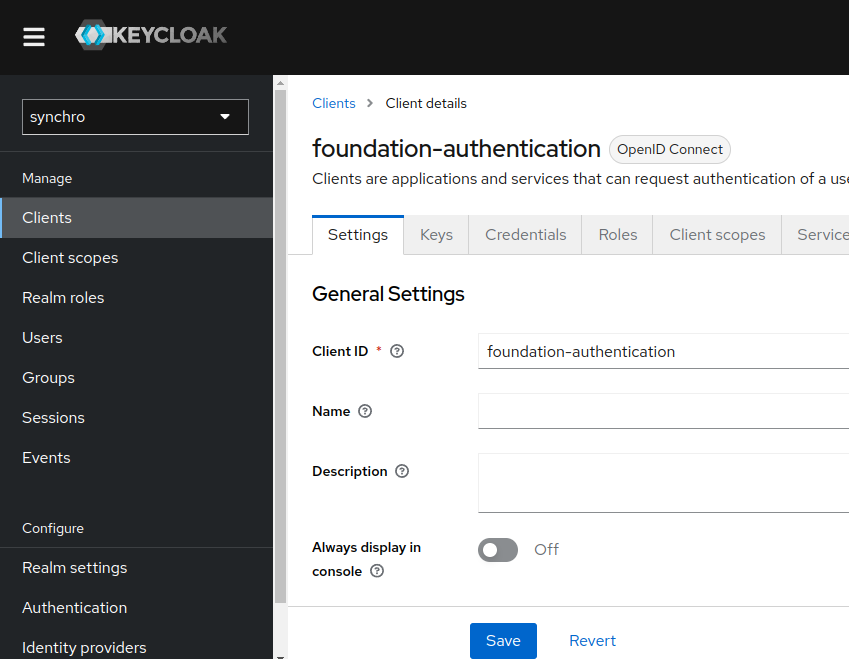
Client to authentication
Procedure
-
At Client Settings Tab in General Settings fill client id field with the client ID name, we suggest
foundation-authentication -
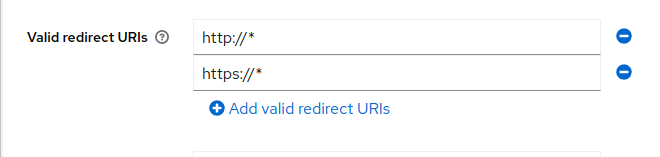
Insert a "Valid Redirect URIs", In
Access settingsgroup thedefaultvalue for Valid redirect URLs ishttp://*,https://*:Required field. Enter a URL pattern and click + to add and - to remove existing URLs and click Save. You can use wildcards at the end of the URL pattern.
Security advise
Using the default values
http://*andhttps://*makes your keycloak client accepts authentications redirects to all url protocols and adresses. It's a full wild card settings. To make your enviroment more secure we recommend edit this values to accept only recirects came from specificsfoundationservers and protocols.See example bellow:
Generic/Default:
http://*and/orhttps://*or
Specific:
http://172.25.0.0/*and/orhttp://synchro-dev/*Basic settings, see Keycloak Basic configuration.
-
Enable "Client authentication", "Service Accounts roles" and "Direct access grants" properties at
Capibility Configgroup.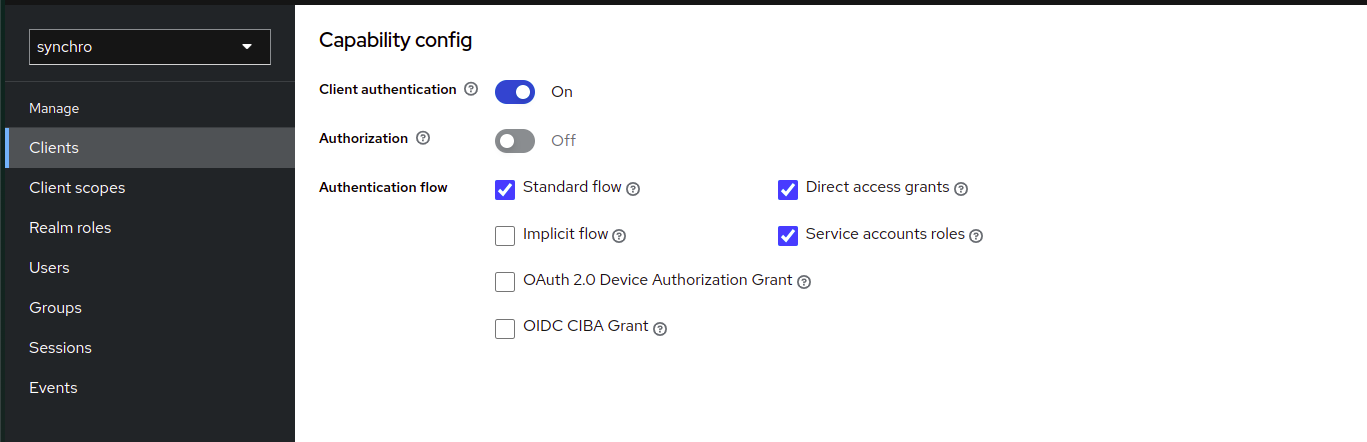
-
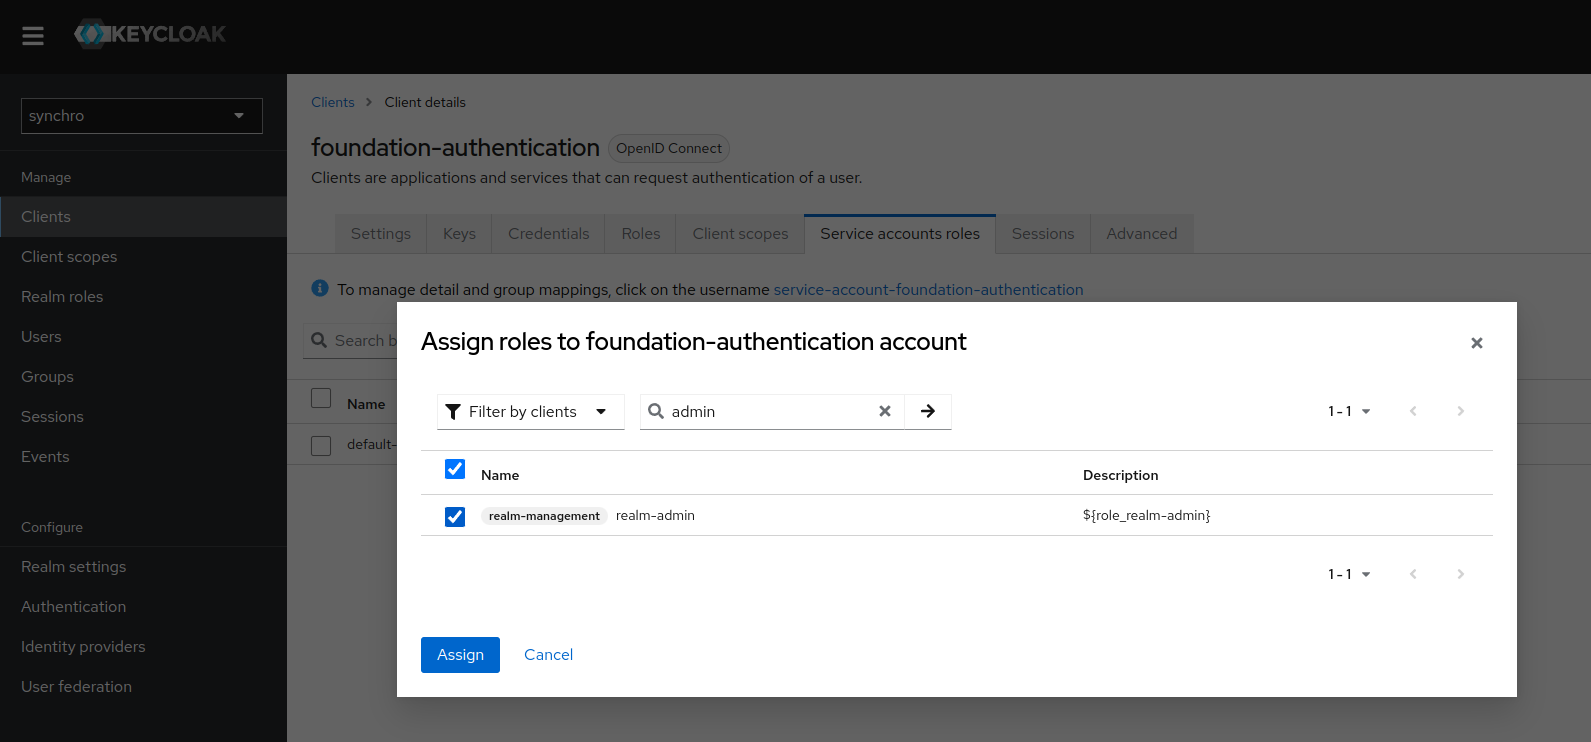
Assign realm-admin role to "Service Accounts roles"
4.1. Click in "Assign Role"
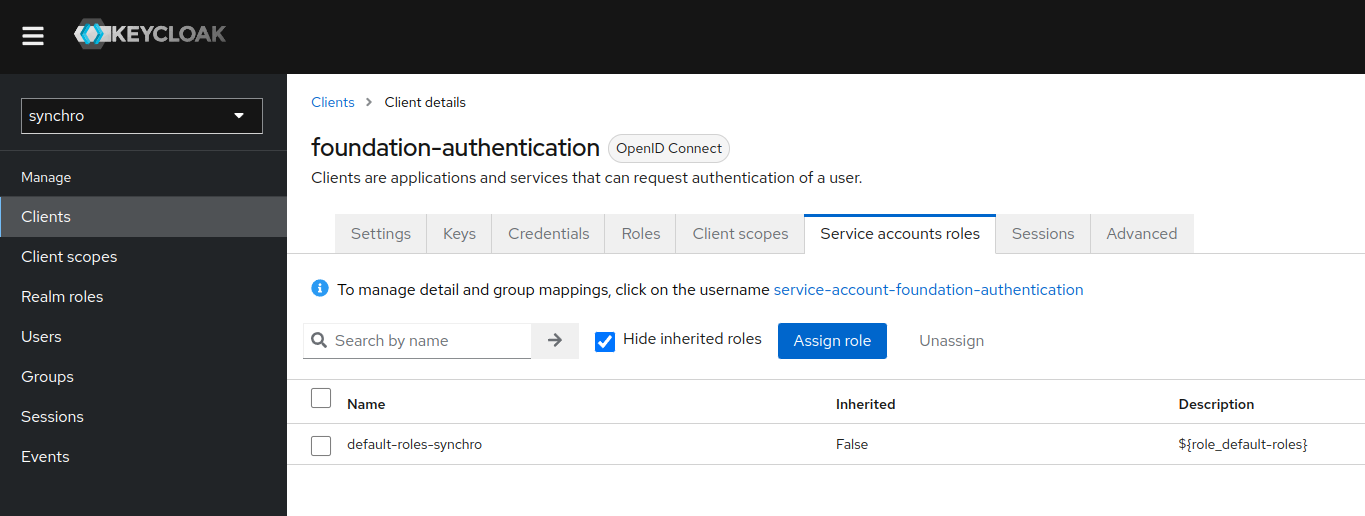 4.2. Select "realm-admin" roles and click in "Assign"
-
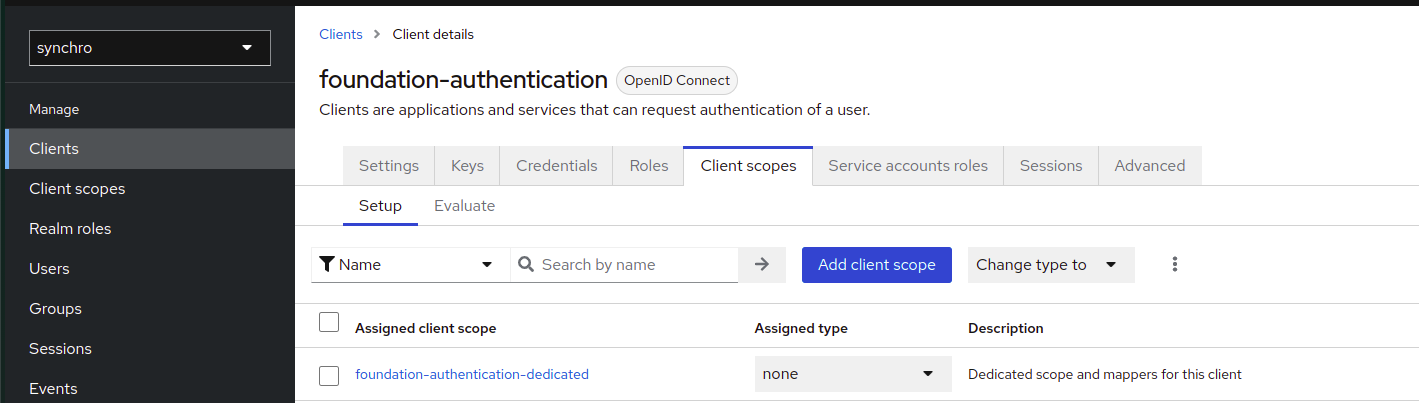
Active foundation-authentication-dedicated full scope.
5.1. Click in "foundation-authentication-dedicated"
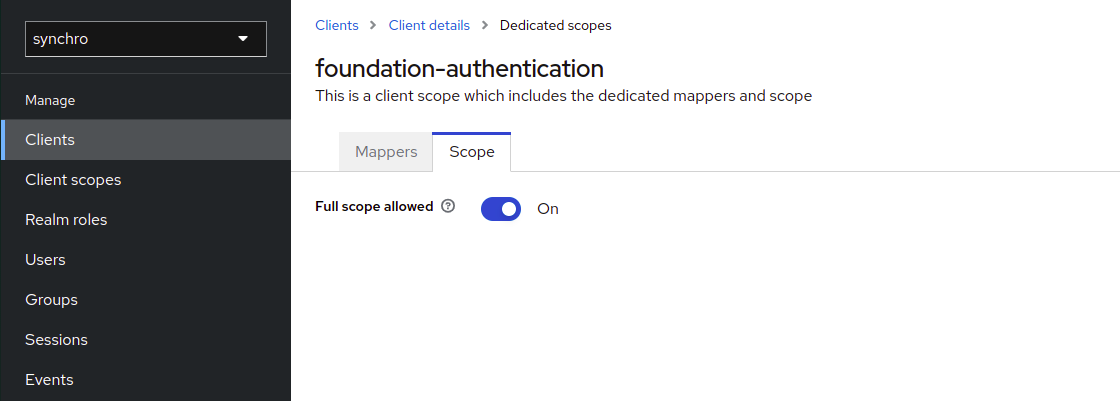
 5.2. Go to Scope tab, then active Full scope allowed toggle
-
Save.
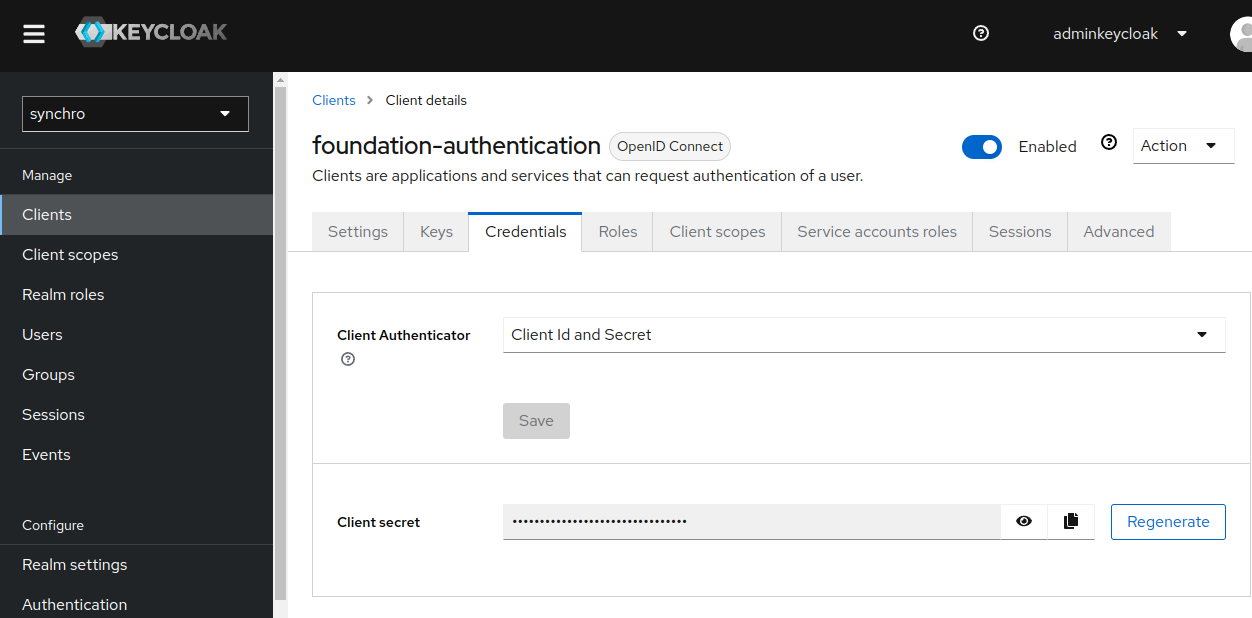
-
Click the "Credentials" tab, now there is a secret.
-
To configure client authentication in foundation:
Client for tenant
If your environment is Multitenancy, create a client for each Tenant.
Procedure
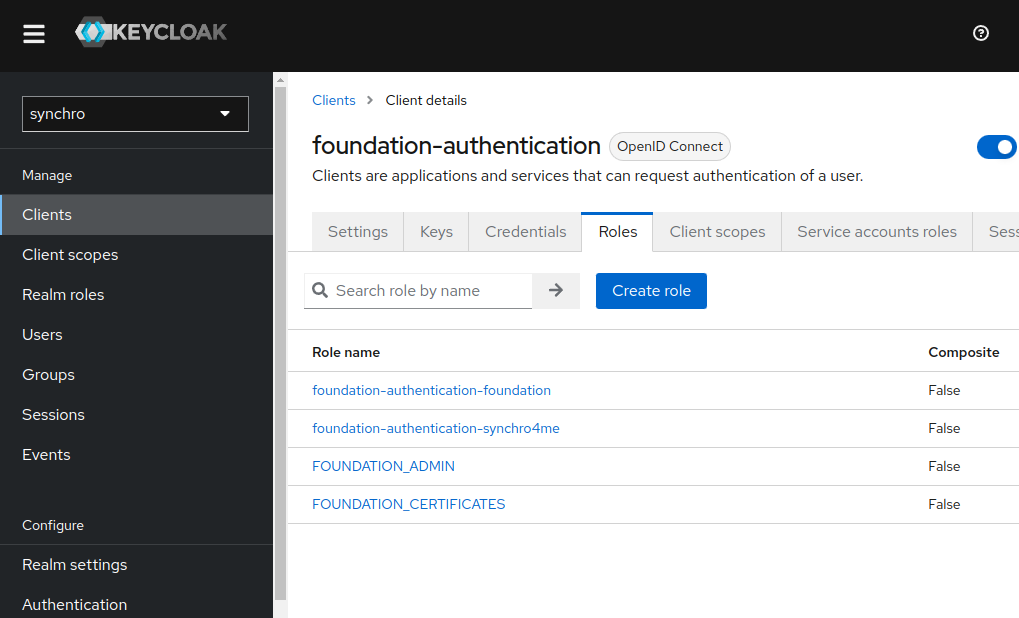
Clients roles application
Most often, clients are applications and services that want to use Keycloak to secure themselves and provide a single sign-on solution. Clients can also be entities that just want to request identity information or an access token so that they can securely invoke other services on the network that are secured by Keycloak.
All Clients needs this role to access application URI
Procedure
-
Click "Clients" in the menu.
-
Select your client.
-
Click the "Roles" tab, and "Create role" button.
-
Add a role following the pattern.
See example bellow:
Pattern:
<clientID>-<application>Client ID:
synchro-desenvolvimentoapplication:
foundationResult:
synchro-desenvolvimento-foundationRole mapping feature, see Restrict user role mapping.
-
If this client needs open foundation administration console, see foundation admin.
Foundation certificates
Foundation need a clients role FOUNDATION_CERTIFICATES to update Keystore administration console.
Important
If you need to update the Keystore, add this role in your specific Client Authenticaton or Client Tenant.
Foundation admin
Foundation need a clients role FOUNDATION_ADMIN to open administration console.
Important
If you need access administration console, add this role in your specific Client Authenticaton or Client Tenant.
Adding roles to the user
You can assign role mappings to a user through the Role Mappings tab for that user.
Foundation roles explanation
Foundation administration console: FOUNDATION_ADMIN.
Update Keystore: FOUNDATION_CERTIFICATES.
Procedure
-
Click "Users" in the menu.
-
Click the user that you want to assigning a role. If the user is not displayed, click View all users or search the user by mail at the search field.
-
Click the "Role Mapping" tab.
-
Click the "Assign role" button.
-
Select "Filter by clients" and search by role name.
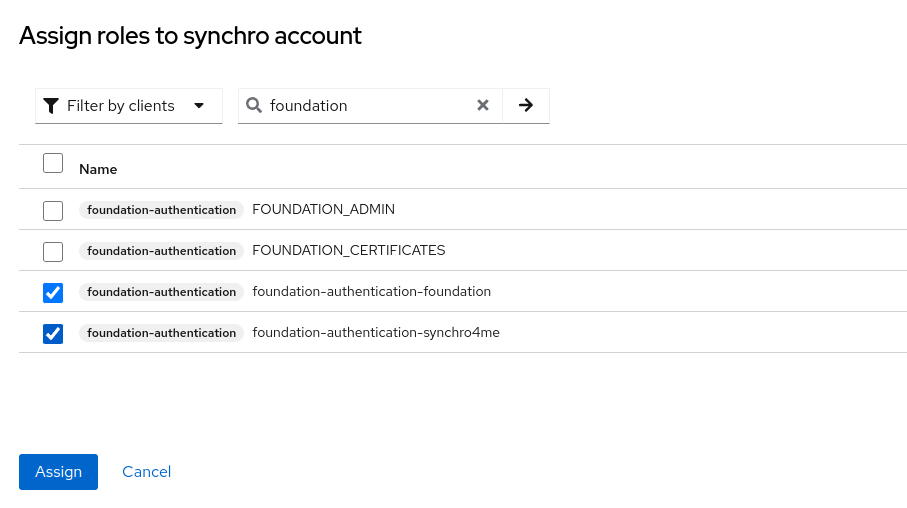
-
Selected roles that you want and click "Assign" button.
-
Do user Logout/Login in application to get new roles.
See more, in Keycloak assigning role mappings.
Regenerate Client secret
Procedure
-
Click "Clients" in the menu.
-
Select Client.
-
Click the "Credentials" tab.
-
Click the "Regenerate" button.
-
To configure client authentication in foundation:
-
Access View.
Change keycloak information
INFO[0000] Reading profiles from /etc/foundation/
default

QUESTION: Select your profile file (current: default):
QUESTION: This command changes your keycloak settings to local. Use only if you are an on premise installation. CONTINUE? (y/N): y
Domain name
If you have different tenants: In many multitenant, a domain name is used to identify a tenant.
Example for Domain name:
URL: synchro.com.br
Synchro4me DNS Requirements
Some Synchro4me applications requires an DNS configured to your server to identify your tenant. Like foundation-prd.synchro.com.br in this case the tenant is FOUNDATIONPRD. Please consult the Synchro4Me manual to see DNS requirements.
URL server
Realm
Get Realm name from Realm, see Keycloak Realm
Client ID
Get Client ID from Client authentication, see Keycloak Clients authentication
Client Secret
Get Secret credentials from client authentication, see Keycloak Clients authentication
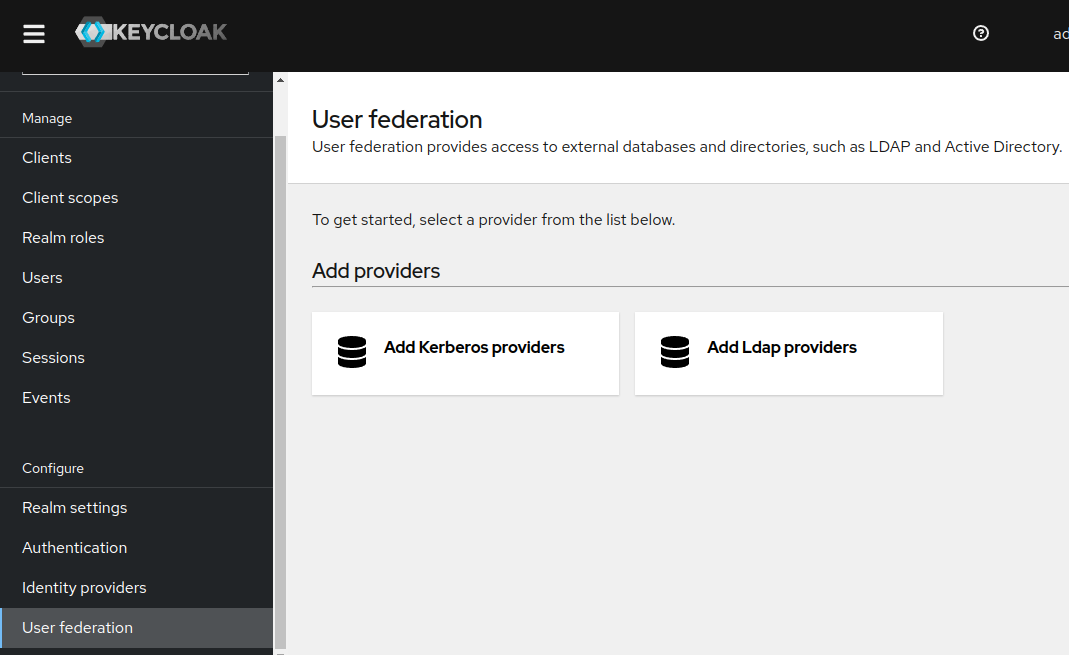
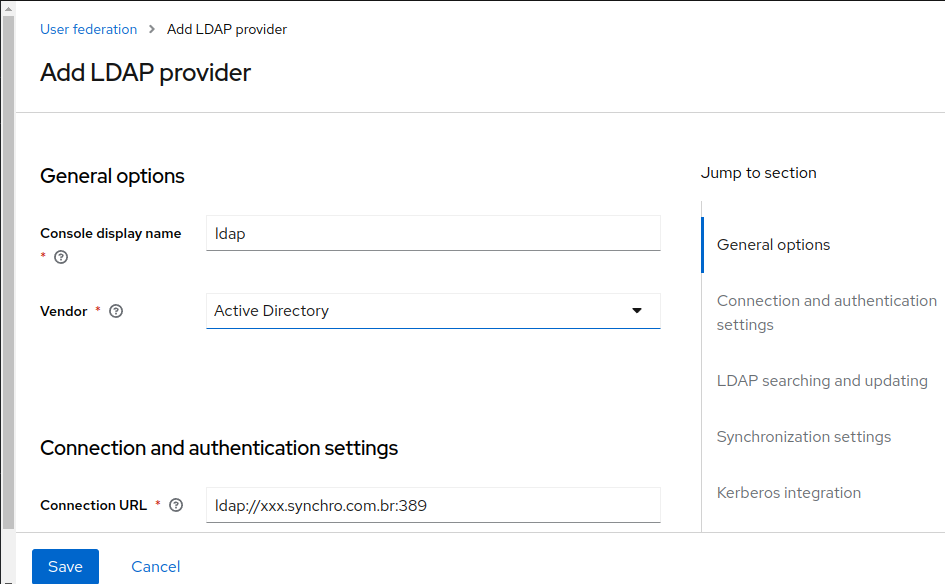
LDAP configuration
-
Click "User Federation" in the menu and "Add Ldap providers".
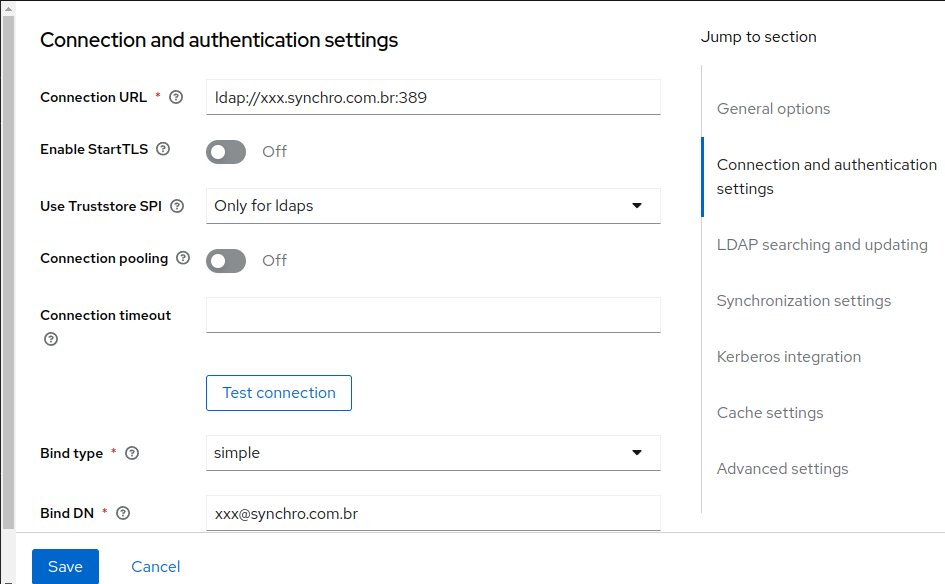
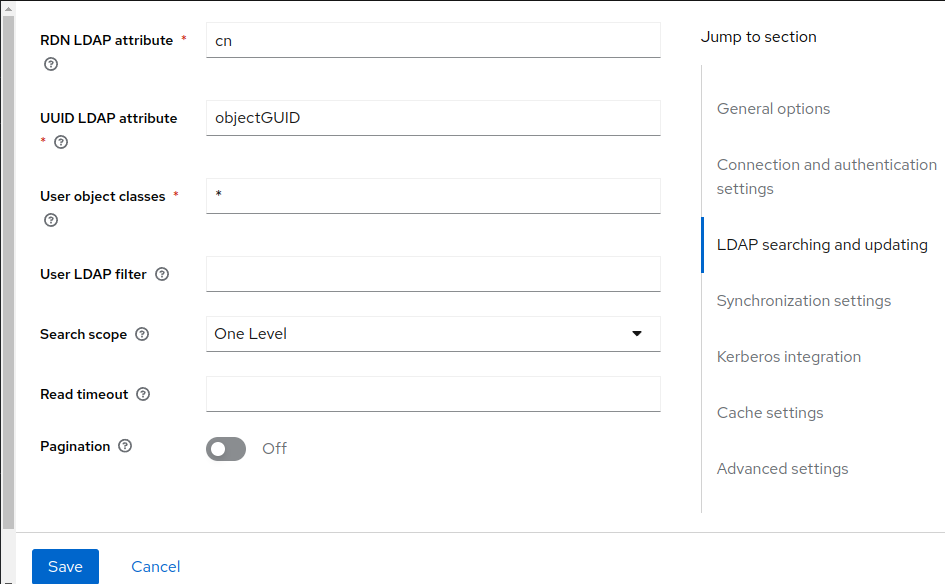
-
Fill all fields like the example below
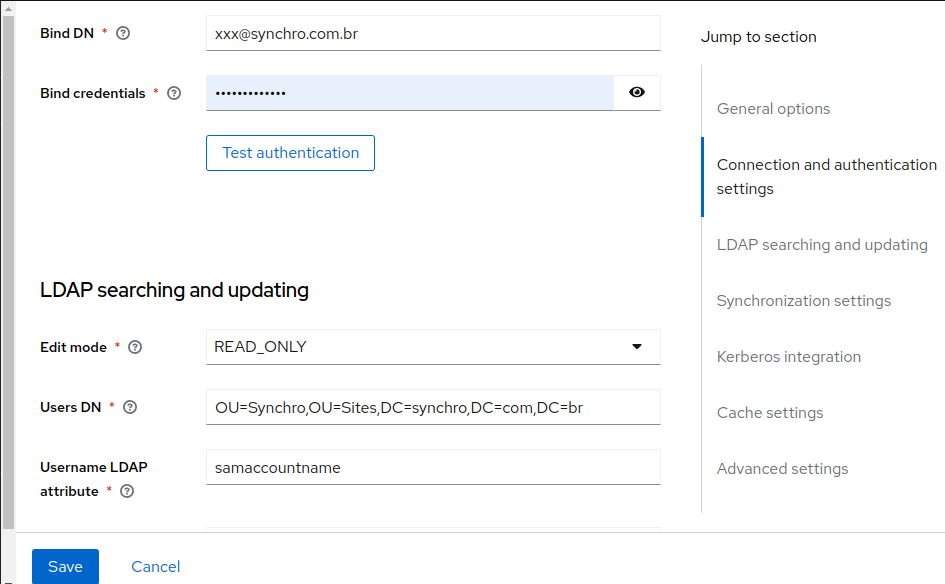
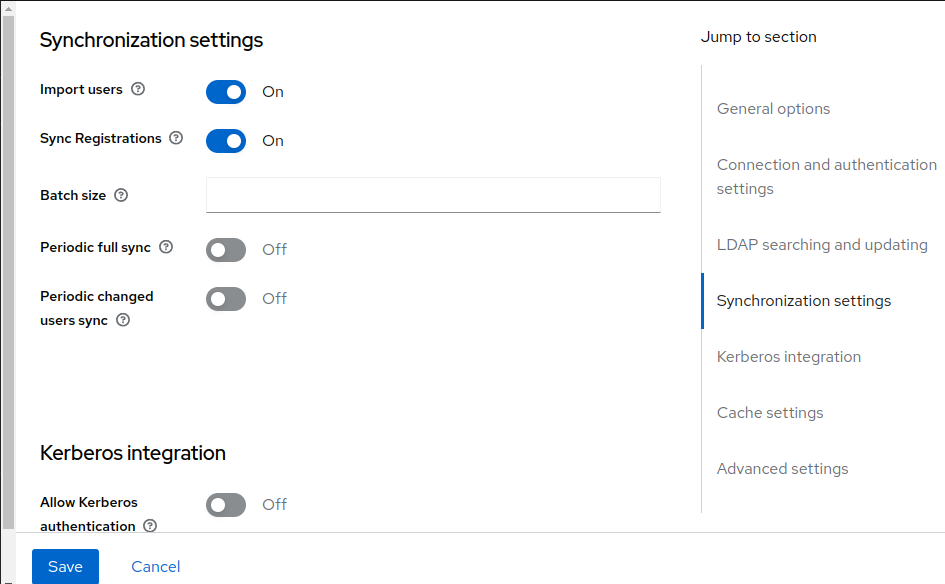
-
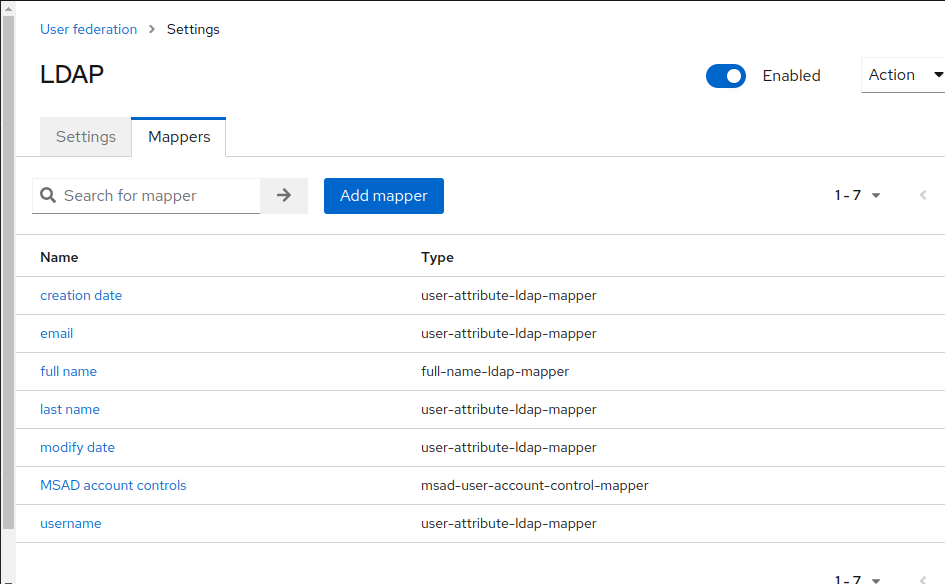
Save and click "Mappers" tab, to create ldap fields relations, create all relations what you need:
Mapper list:
Mail relation example:
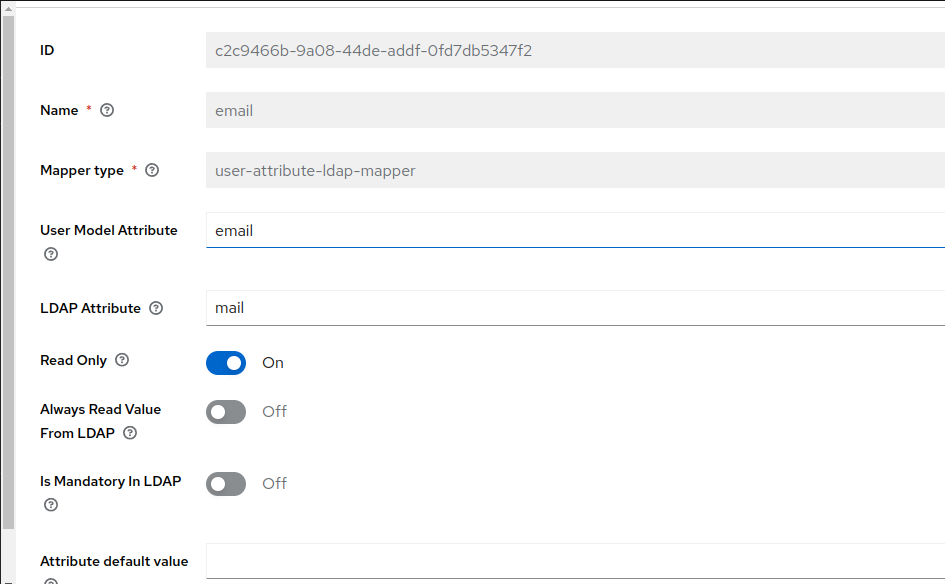
See more details, in Official Keycloak LDAP configuration site.
Valid Redirect URIs
The fields for "Valid Redirect URIs", In Access settings at your Keycloak Client to authentication configuration need you attention for more security.
The default values for "Valid redirect URIs" is http://*, https://*:
Using the default values http://* and https://* makes your keycloak client accepts authentications redirects to all uri,protocols and adresses. It's a full wild card settings.
To make your enviroment more secure we recommend edit this values to accept only recirects came from specifics foundation servers and protocols.
Enter a URL pattern and click + to add and - to remove existing URIs and click Save. You can use wildcards at the end of the URI pattern.
See example bellow:
Generic/Default: http://* and/or https://*
or
Specific: http://172.25.0.0/* and/or http://synchro-dev/*
For basic settings, see Keycloak Basic configuration.
SSO
See more details, in Official Keycloak SSO protocols
Auto Login
This is needed when a user would like to go directly to the platform and skip the “login with OIDC SSO or OKTA” page. This can be turned on (or off) by following the below directions:
- Login to the Keycloak Administration Console
- Ensure the Synchro Realm is selected
- In the left-hand-menu, Click on Authentication
- Under Flows select Browser
- On the Identity Provider Redirector line, click on Settings 5.1 If you would like to disable (turn off) the auto login - we can 'Clear’ information on the Identity provider redirector line
- Enter the name of the Identity provider, e.g. oidc, in both the Alias and Default Identity Provider boxes
- Select Save
Truststore
If you need additional certificates, which will be the case if you have self-signed or internal certificate authorities that are not recognized by the Keycloak default JRE, they can be included in the /foundation/system/default/foundation/keycloak/truststore where /foundation should be your configured foundation volume, only truststore accepeted into this directory or subdirectories. The certs may be in PEM files, or PKCS12 files with extension .p12 or .pfx. The certs must be unencrypted - meaning no password is expected. And also root permissions is needed as well if new subdirectories was created within this default directory.